Turbocharger Buyer's Guide
Buying a turbocharger for your car can sometimes be a daunting and confusing task. At maxpeedingrods.com, it is our mission to make that task as an easy and painless as possible. This Buyer's Guide is designed to answer any questions you may have during your search for the right turbocharger for your car, and how to buy a turbocharger on our website.
What is a turbocharger?
A turbocharger(turbo)is a turbine-driven forced induction device that increases an internal combustion engine’s efficiency and power output by forcing extra air into the combustion chamber. When a turbocharger brings more air into the chamber, it gets mixed with more fuel, yielding more power as a result. It smuggles air by compressing it using the energy of the exhaust gasses coming out of the engine.
How does a turbocharger work?
How does a turbo work in a car engine? It applies almost the same principle of a jet engine. It has two main parts – a turbine and a compressor. When one part spins, the other spins with it too because they are linked to each other. Exhaust gasses blast out of the engine when the fuel burns inside the combustion chamber. The gasses go down into a tube and wind the turbine, which rotates at significantly high speeds and causes the compressor (which is actually a turbine in reverse) to spin. This chain of action siphons more air into the engine cylinder, allowing burning more fuel and producing more power each second.
How to buy a turbocharger?
Correctly identifying the turbo means you'll get the right replacement first time, saving you time, money and hassle. In order to supply the correct turbo for your vehicle, we will always ask you to supply the part number from the Turbocharger either directly from the Turbocharger itself or by contacting your vehicle dealer to get the OEM part number from them. Most part numbers can be found on the name- plate of compressor housing, as shown below.
• Finding the right part number with GARRETT turbochargers.
• Finding the right part number with IHI turbochargers.
• Finding the right part number with KKK turbochargers.
• Finding the right part number with Mitsubishi turbochargers.
• Finding the right part number with HOLSET turbochargers.
• Finding the right part number with SCHWITZER turbochargers.
You can contact one of our turbo specialists at https://www.maxpeedingrods.com/ for further assistance on how to buy a turbocharger.
Why buy turbochargers at MaXpeedingRods?
MaXpeedingRods has been engaged in the research of overseas racing products and culture for decades. If you are looking for turbochargers, you have landed at the right place. On the basis of your vehicle make and model, you can choose from a plethora of automotive maintenance and accessories. MaXpeedingRods offers a seamless online shopping experience and the streamlined e-commerce interface makes it easy for you to find just the turbocharger you want.
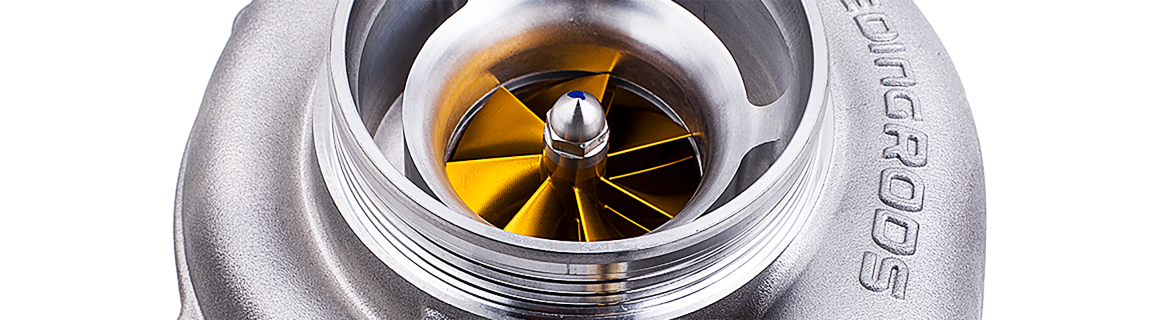
MaXpeedingRods offers a variety of turbochargers in both Sport performance and Street performance.
• Stainless steel volute with high temperature resistance 1050 degree Celsius
• Aluminum blades with CNC precision machining forging
• Imported movement bearing and precise dynamic balance support maximum pressure 3.0bar Water-cooled structure greatly extends turbine life
• The corresponding horsepower range is 300—850
• High nickel alloy shell with high temperature resistance 850 degree Celsius
• Imported floating bearing structure and precise dynamic balance
• Aluminum blades with precision machining forging
• The corresponding horsepower range is 200-600
For professional assistance, you can reach out to us via our website
https://www.maxpeedingrods.com/

What are the signs that my car needs new turbocharger?
Turbos are supposed to be long-lasting, however, it is still possible that some damage may happen over time. If you’re wondering whether your vehicle needs to have the turbocharger replaced, look for the following 5 signs:
The primary function of a turbo is to make your car more powerful. One of the first noticeable symptoms is a lack of power and slow acceleration. If you notice that it doesn’t accelerate as fast as it used to, the first thing you should consider checking is the turbo.
2. Burning OilBurning excessive amounts of oil is typically a sign of a turbo failure. Locate the downpipe, at the front of the turbo, and disconnect it. You can look inside the turbine by using an endoscope; if there is oil inside, that’s a sign of gradual failure. You should resolve the problem as soon as possible; if left untreated, your turbo will eventually fail.
3. Excessive Exhaust SmokeIf the turbo housing cracks and or if there are worn internal seals, this may lead to oil leaking into your exhaust. As the oil burns off you will see a distinct grey or blue smoke. This symptom is more apparent when the turbo is in use. So if you notice smoke when you rev your engine, it could be a sign of a faulty turbo.
4. Check Engine Light or CELOn most modern cars, the computer diagnostics will detect a failing turbo resulting in the “check your engine.” With that said, the CEL is displayed for a number of problems, sometimes it warns us of a loose gas cap and sometimes about far more serious issues. One of those more serious issues could be the turbo. It’s best to have a mechanic look at your vehicle if the CEL is displayed.
5. Loud Whining NoiseWhen the boost is running, a failing turbo could make a loud whining noise. The noise usually sounds like a siren, and it tends to get louder as the problem aggravates. If you notice an unusual noise paired with some of the above symptoms, your turbo might be failing. When a turbo becomes faulty, there are plenty of warning signs. They are often audible or they offer visual queues. Ensure at each servicing that you have your oil changed to avoid carbon deposits. If your turbo is older, consider having it replaced. If you aren’t experienced with vehicle components, have a licensed mechanic diagnose the problem.

How to install a turbocharger in a car?
Have you ever wanted to know how to install a turbocharger, but the task seems too daunting? Don’t wait to upgrade your turbo! Let expert mechanics at MaXpeedingRods help with this step by step guide.
Step 1: Unplug the green hose from the compressor intake duct. Remove the intake duct and crankcase breather.
Step 2: Remove the boost control module from the front of the x-section pipe.
Step 3: Remove the temperature sensor wires from the front of the x-section pipe.
Step 4: Unplug any remaining hoses and electrical connections from the x-section pipe.
Step 5: Loosen hose clamps and remove the x-section pipe from the engine. Cover intake manifold openings to prevent foreign objects from entering the pipework during this installation.
Step 6: Using a 7/16” deep-well socket, loosen turbine outlet v-band clamp and move clamp off of the flange. Separate down-pipe from turbo.
Step 7: Using a 7/16” deep-well socket, loosen turbine inlet v-band clamp & move the clamp off the flange. This is the most difficult step of the installation. Use penetrating oil to help loosen the clamp.
Step 8: Reach under turbo and slide the clip on the EBPD control rod towards the pedestal to free the EBPD crank.
Step 9: Remove the 2 bolts holding the turbo to the pedestal and unplug the red pressure line from the actuator.
Step 10: Make note of the turbo’s position and how it fits on the engine for future reference. Lift the turbo off the pedestal and remove from the vehicle.
Step 11: Remove the backpressure valve assy from the old turbo and install on the new turbo. Use anti-seize compound on the threads & torque the bolts to 185 - 215 lb-in.
Step 12: Ensure the supplied oil inlet and outlet o-rings are properly seated on the pedestal. The turbo oil drain hole will pilot on the raised sleeve. NOTE: Before installing turbocharger, inspect and remove all foreign material from turbo air inlet, exhaust inlet, & exhaust manifold.
Step 13: Install new turbo.
NOTE: Turbine inlet flange should line up with the mating exhaust flange. The pin in the Yflange should mate with the hole in the turbine housing flange.
Step 14: Ensure the crank pin for the EBPD drops into the hole in the control arm rodend. Slide retaining clip back into place ensuing the clip fits into the crank pin groove.
Step 15: Install and tighten 2 turbo “hold down” torque to 35-37 lb-ft.
Step 16: Position and install turbine inlet v-band clamp and torque to 110-130 lb-in.
Step 17: Install downpipe. Guide the v-band flange to mate with the turbine discharge flange. Install v-band clamp & torque to 110-130 lb-in.
Step 18: Remove covers (rags in this picture) from the intake manifold openings. Re-use the original compressor discharge o-ring and mount it into the new compressor discharge groove. A light coating of RTV or grease can be used to hold it in place.
Step 19: Position the x-section pipe in place and re-install hoses. Tighten compressor discharge v-band clamp to 110-130 lb in. Tighten hose clamps to 50-60 lb-in, and re-install all electrical and temperature connections.
Step 20: Re-install the red wastegate hose onto the wastegate hose actuator.
Step 21: Double check that the compressor inlet area is free from any foreign objects and that the inlet hose is clean. Install the new compressor 4-inch inlet hose in place and insert the green hose into the boss. Tighten clamps snugly.
Step 22: Re-install the crankcase breather assy, again verifying that everything is clean.
Step 23: Re-install the hose from the breather duct to the air filter housing, snug the clamps. Reconnect battery, and you’re done!
Step 24: Now retrace your steps to verify that everything has been re-installed, re-tightened or re-connected and that there are no loose wires, hoses, or fasteners. Make sure that you have retrieved all rags, tools, etc. from the work area. DO NOT OPERATE the engine without the inlet ducting in place.
Step 25: Start engine and watch for signs of oil leakage at the turbo/pedestal joint. If none exists, drive the vehicle a short distance to fully warm the engine and then re-inspect. Investigate any unusual noise or condition.
Step 26: If all checks out, then there is no further break-in necessary and the vehicle can be driven as usual.